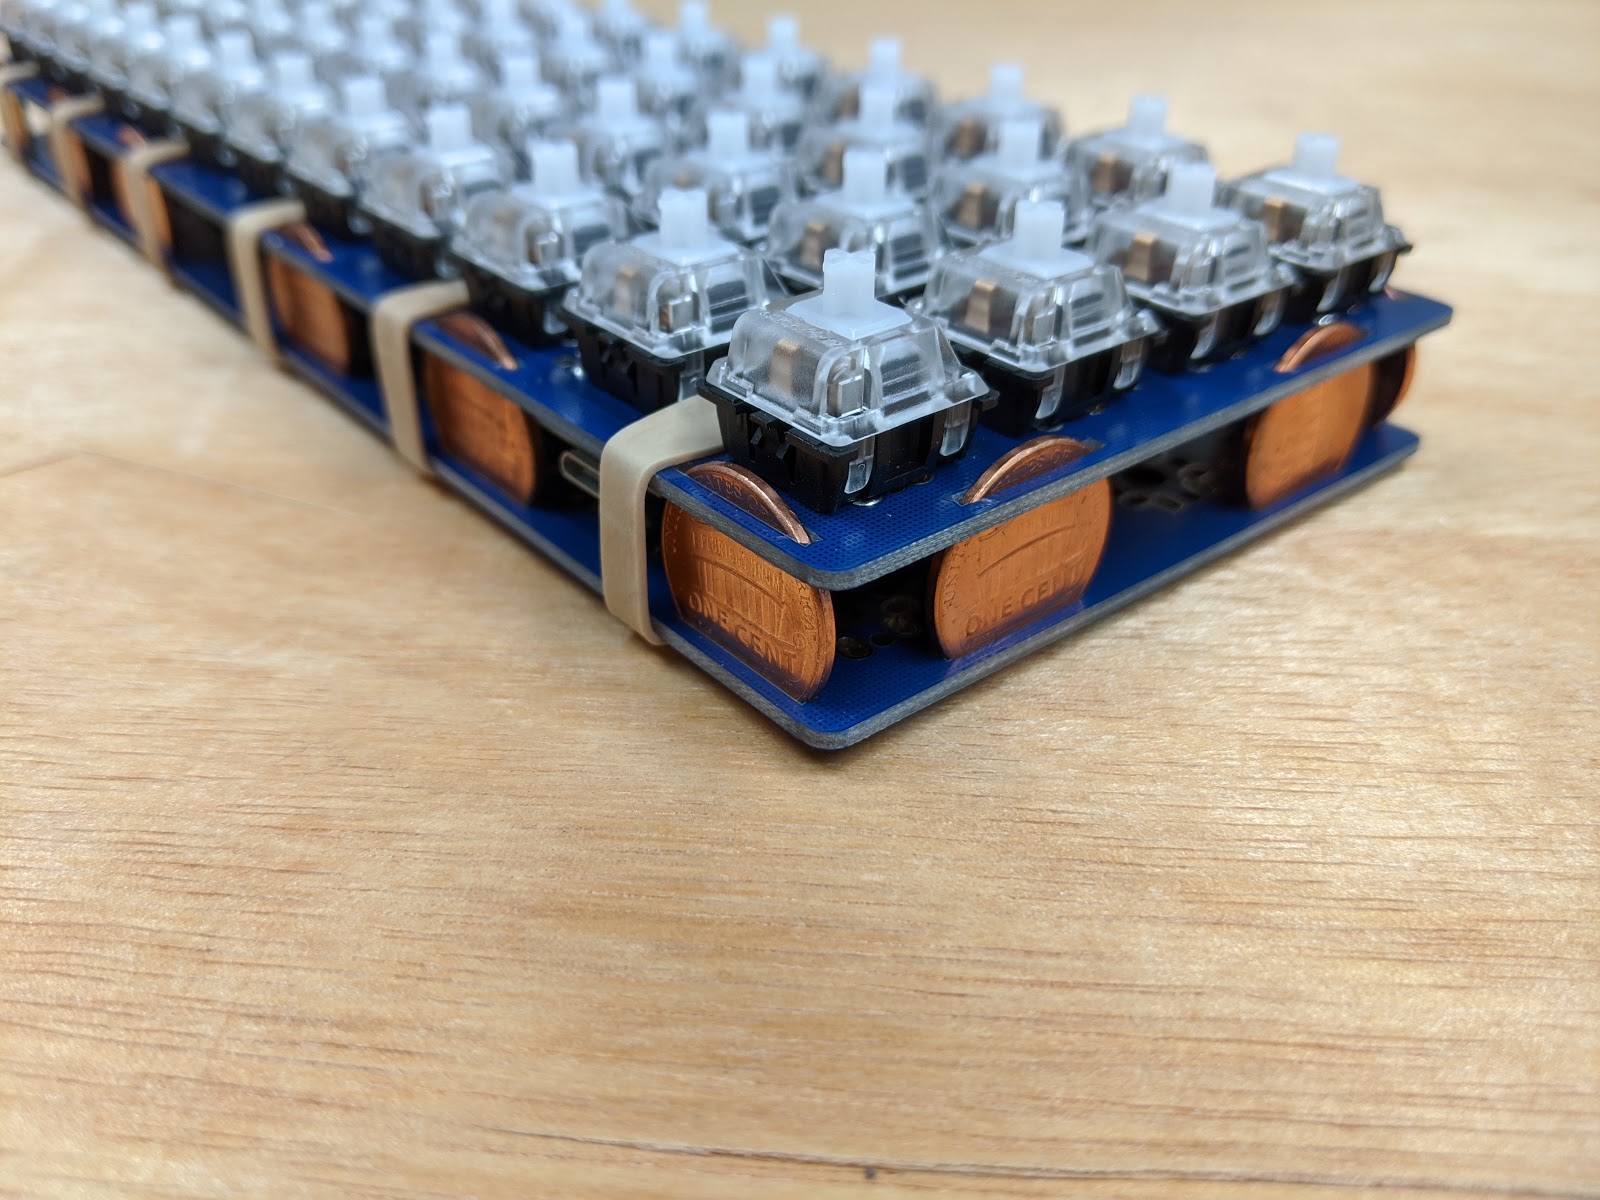
Penny with penny spacers
The Penny is a 4x12 grid layout powered by a Pro Micro. Pennies were used as an alternative to the usual M2 spacers I use to assemble my keyboards. 1.5mm x 15mm slots were added to the perimeter and two in the middle.
Penny's are 19mm diameter and ~1.5mm thick. They fit a bit loose in the slots. Maybe mint condition penny's would be tighter.
18 cents installed in the bottom of the PCB. The Pro Micro is socketed and there is a place for a reset switch. The diodes are installed on the top side of the board. Cathodes to the square pad.
A second PCB is placed on top the main PCB. I have also used dimes and they work as well. You could also use washers in the right size. 17-19mm in diameter.
Rubber bands hold the two PCB together. These are #64 rubber bands that are 3.5" x 1/4". They aren't very tight. There are also #61 and #62 rubber bands that are 2" and 2.5" long. Those should hold more tightly.
On a flat surface it feels quite solid. PCB mount switches were used. This would also work with the 4x4 switch plates I used on the
unquadquad if you needed to use plate mount switches. The switch footprint allows the switches to be oriented in any direction.
The PCB can be flipped. This shows PCB flipped and the Pro Micro installed on the opposite side. The firmware needs to have the order of the Column pins reversed if it is assembled this way. It shares the same matrix layout as the Gnap! and can run the same firmware.
Gerbers on git.
Get PCB pricing on PCB Shopper.